Walkthrough The Gunk.Comprehensive guide to completing all levels of The Gunk, fighting bosses and solving puzzles.
Chapter 1. Dropping Down.
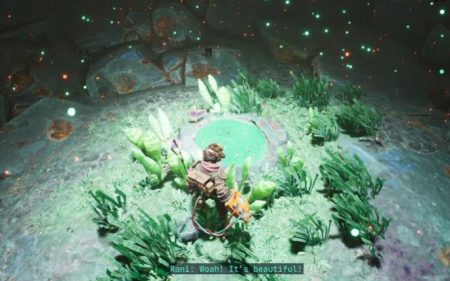
Go through the gorge, turn right and you will see the first minerals on the right. Move closer and hold Q to scan. These are luminescent shards. Keep driving and watch a cutscene with an automatic scan of a substance called Gunk. Use RMB to aim and hold LMB to absorb all the slime. After that, vegetation will appear in the place where the mucus was. Hold Q to scan. Run to the right where the wind is blowing. In the cave, you can scan purple fluorescent crystals. Head through the cave and scan the three slime piles to the right to reveal a huge tree. Your partner will be able to land the ship.


Chapter 2. Looking for a Signal.
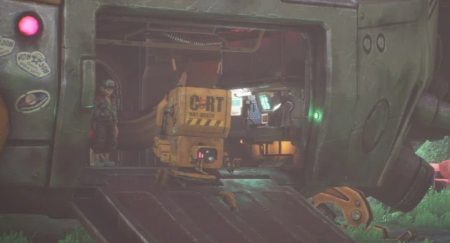
Inside the ship, on the right at the entrance, there is a computer that allows you to perform improvements. Scan blue and red mushrooms and a globular plant. Use your cannon on him. You need to collect 20 pieces of metal. Go down from the ship and near the cave entrance you will see glowing fruits. Collect them. It is organics – one of the four main resources. Go inside the cave. Scan Glowing Plants with Small Buds and Large Blink Anvil Crystals. Collect the latter. They give the second main resource – metal.


Advice . The more you scan everything, the faster you unlock various improvements. The progress bar until the new improvement is shown on the tab that appears when scanning (below).
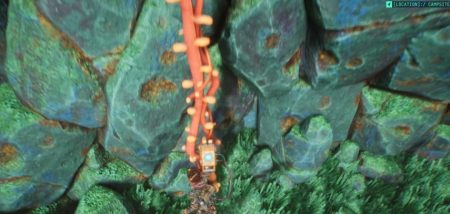
There are also large piles of metal here. Collect 20 units. Exit through the other entrance to the cave. Go up. When you collect 20 metals, be sure to find a liana at the top that can be lowered down and create a short path to the ship. Complete the first mechanical arm upgrade. to the right of the ship there is a passage to the liana, which you used to create a short path. There is a green energy pond nearby. You need to place the seed of the plant in it, which is located in front of the ship. Walk up to the plant, hold LMB and step back to pull out the seed. Throwing a seed into an energy pool will spawn a large mushroom.


Climb up and absorb all the mucus. A “tongue” will appear on the side, by which you can easily climb here next time. Jump down, take another seed. Holding it in your hands, you deprive yourself of the opportunity to make jumps. Therefore, throw the seed onto the ledge from above, where you absorbed the mucus, then follow the “tongue” up behind, and carry the seed forward to plant it in another puddle of energy.


Jump up other mushrooms. Go through the opening on the right to find a special plant. Pull on it and it explodes into several fibers. Collect fibers – the third main resource in the game. Back out and head right to absorb another slime. A passage will open, and mushrooms will appear on the left. Jump on them to the ledge to get into a separate adit with resources – organic and fiber. Move the other way, destroy the slime in the next passage. Mushrooms will again appear on the left, allowing you to enter the area with additional resources. Go inside the cave to move to a new location – “Mushroom Jungle”.
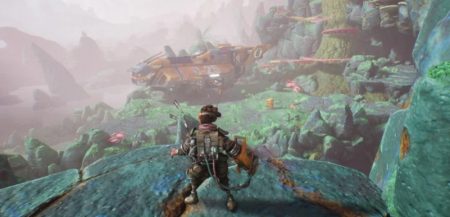


Remember to scan whatever you see. Destroy the slime. Beware of the area with a red spot – explosive shells fall there. When all the mucus is absorbed, a large tongue will appear. Use it to get out of the cave into the jungle. Destroy the slime in front and to the right (jump to the yellow ledge) while avoiding the falling projectiles. Languages will appear. Pick up the seed and throw it into the green energy spot on the wall by the large mushroom. Climb up and go down the liana on the other side.
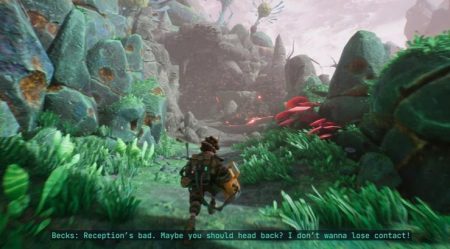


There will be a new plant in the cave on the right. Rip it open to get some metal. Keep going collecting resources until you find monsters. Scan them without getting close and then destroy them. To do this, you need to attract monsters with a cannon and throw them in any direction (they will explode). The monsters will drop the fourth type of resources – alien organic matter. Defeat all monsters and absorb the slime. There is a puddle of energy in the ground. Walk forward to collect additional resources, and then go back and jump along the ledges in the water to the left. Absorb all the mucus to create a globular seed plant. Take one seed and throw it into the narrow passage to the side using RMB aiming. Go there, throw the seed into the green puddle and climb up the mushrooms. Both to the left and to the right there are caches with resources.
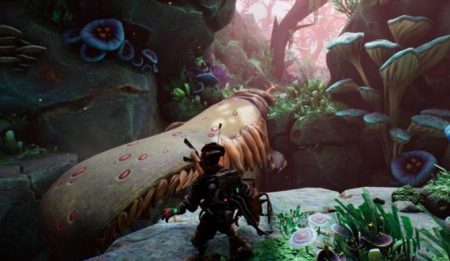


Go back to the plant, take the seed and throw it on the ledges in the water to come back with it. Plant a seed in a green puddle for mushrooms to grow, and jump over them after the animal. After jumping on mushrooms, turn left to go in a circle and collect additional resources (do not forget to go down the liana into the cave with metal). This will create a shortcut back. Now go right and go down the liana. Clear the cave from the mucus and go forward.
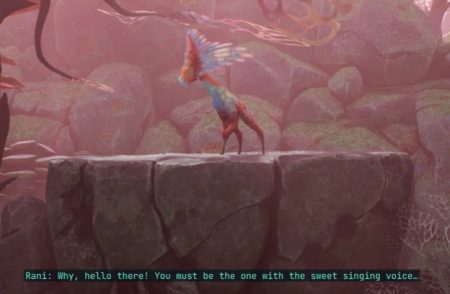


Destroy all the mucus a little further than the animal. You will need to clear the cave on the right. Then a plant will appear at the exit. Take yourself and place in the green puddle below. Mushrooms will appear, the animal will run away. Take another seed and throw it onto the yellow ledge to the right of the mushrooms that appear. Climb up with the trail and throw to the right. But first you can go through the cave opposite and collect resources. Drop the seed into the green spot for an extra mushroom to spawn. Go to the mushrooms that grew earlier and jump to the left. Climb up the liana and jump on the large and additional mushroom to the resources. Having collected everything that you could, continue to move after the animal. Watch the cut-scene.


Destroy all monsters to help the animal, absorb the slime and move further along the tongue. Turn right under the tree trunk and find the cave entrance, which leads to a new location. You will discover alien ruins. Walk right and absorb the mucus. Bend down and move on. Scan the slab in front of the ruins. Jump on the platforms up to the place where the beacon is installed. Once installed, you can quickly navigate between the ship and the alien ruins.
Chapter 3. An Alien Civilization.
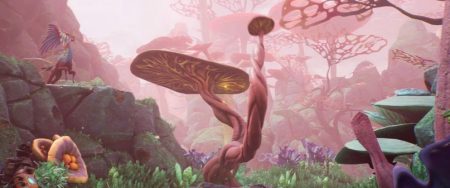


Return to the ship to start the third chapter. Upgrade your gear (be sure to buy a pulse cannon, and the rest is optional), then go to the lighthouse to the right of the ship, where Bert will stop you. After talking with her, use the beacon and return to the alien ruins. Go around the tower near the beacon to find a descent down into the dungeon. Right-click at the yellow dot above the alien door and fire the Pulse Cannon by pressing E.
You will find yourself in the Ancient Ruins. Scan the door ahead. Look to the right and down and fire the Pulse Cannon at the yellow dot. Go further, destroy the movable slime and monsters. Look for the plant behind the wall ahead. Throw the seed into the green puddle and climb up the mushrooms. Jump onto the yellow ledge and get over to the other side of the wall. Walk along the pipe to a new location. You will find yourself at the Polluted Lake. Turn right and find an exploding sphere. Pull it out of the plant and throw it into the rubble blocking the path. After the explosion, move forward.
Chapter 4. A Corrupting Force.
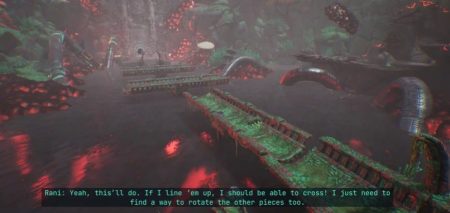


Walk forward and pull the round metal sphere to rotate the first part of the bridge. There are two more to deploy. First, go up the liana on the left and go down the other. You will see another liana in front, which is covered with metal parts. They need to be blown up. Climb up the yellow ledges to the left of her and take the explosive ball. Throw at the fragments to destroy them, and climb up the liana. Eventually, you will see a passage on the left with an alien door. Shoot at the yellow point on the right and move into the passage of the northern mountain.
At the new location, first turn left, climb the liana and jump from it. Absorb all the slime and go to the explosive projectile to be thrown at the wreckage. Follow further along the cliff to the left. Fire your Pulse Cannon at the Explosive Projectile to destroy the debris from below. Go there and shoot the explosive projectile again. Throw it into the debris above the vine and get out to a spacious location.
Scan the plate and look for the plant on the left. Take the seed and carry it to the energy pool on the right. Plant it and climb up the mushrooms. You will return to Polluted Lake. Go further, kill monsters and absorb the slime. Then pull the next lever to rotate the second part of the bridge. Head through the cave on the right and drop the vine down to create a shortcut. Return to the bridge and walk to the right of it. Walk to the right, throw the explosive projectile to the right to blow up the debris. Now you can jump there, climb up and open the passage to the south mountain. Again, you need to shoot the yellow dot with the Pulse Cannon.
Take the explosive ball and throw it into the slime on the left. Do the same with the slime on the right and jump over the tentacles to the other side. Shoot the explosive ball above the debris to detonate it. shoot at two more spheres, to which you can go through the passage on the left. By detonating both clots of mucus, you activate the tentacles. Go to the other side. There is a vine here leading to additional resources. There are debris at the bottom. Shoot at the nearest explosive sphere and throw down into the debris, and then go down on the liana for prey. Go back up and blow up the following debris, and then get out through the cave back to the Polluted Lake.
Destroy the monsters and goo, then pull the lever to rotate the last part of the bridge. Shoot a seed and plant it in an energy puddle. Climb up and lower the vine to create a shortcut to the bridge. Cross the bridge and activate the beacon. You can return to the ship and buy upgrades.
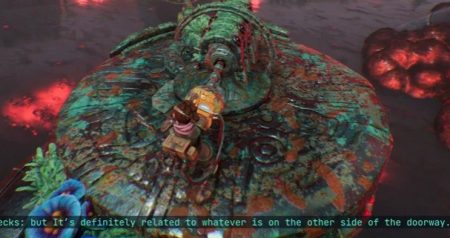


Go through the opening and find yourself in front of a huge slime tower. Move forward and start climbing. You don’t need to absorb all the mucus! It is enough to clear your way up, removing mucus from the yellow protrusions. Run along the path hidden behind the slime in front and destroy the flying slime and monsters. Jump onto the yellow ledge to the side. Run forward along the path. More precisely, you need to walk calmly and use the cannon to absorb the mucus in front. The mucus will gradually creep towards you. Keep calm and take your time. Soon you will find yourself in the second clearing, where there will be monsters and flying clots of mucus. Deal with everyone and move up the tentacle.
After climbing to the very top, jump to the right and scan the control device. Rip out three fuses and destroy it to clear the entire tower. Watch the cut-scene.
Chapter 5. Pure Lightning
Go down from the tower and follow even lower along the vines, under the tower. There will be a passage to a new location, to the canyon. Go ahead and install the beacon. Return to the ship if desired. The debris blocks the way further. Look for a vine on the opposite side of them. Climb the liana and jump to the adjacent platform, just below, and look for an explosive sphere behind the plants. Throw it into the wreckage. Go further through the cave. Go down and find a sphere at the top. Shoot her and throw her into the large debris. Jump forward along the platforms, follow through the cave and climb up the liana. The path further is blocked by debris, and there is an explosive sphere on the ceiling. Shoot her, then hold down RMB and LMB to pull when she falls. Throw in the rubble to clear a path for yourself. Keep on moving climb higher and throw the orb into the other wreckage. Go to a new location.
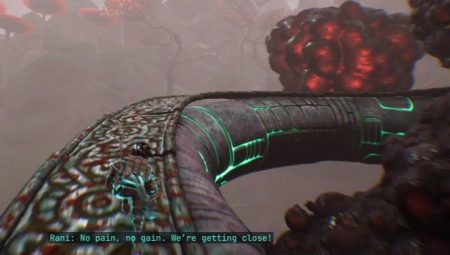


You will be taken to the Desert Mine. Destroy four flying clots and the rest of the slime by moving around the pipe. Pull the lever in the center and shoot at the opened yellow dot. Get on the lift in front, turn around and shoot at the yellow dot at the top of the wall. Jump across the platforms and follow the yellow line up. Pull the three levers and go down to the center of the hall. There will be a spinning thing. Take a moment and jump through the holes below it. move in the basement and jump on the rotating blades. Everything is quite simple here. Rise up the elevators, shooting at the yellow dots. After the second or third elevator, you will find yourself already under the ceiling of the room. Jump onto the spinning blades and to the right. You can throw an explosive projectile into the debris opposite to collect additional resources. Jump from the place where the projectile grows, on a double blade. It revolves around a column on which a plant with a seed grows. Pick the seed and throw it at the green dot on the wall. Jump further and get to the slime. Destroy it and pull the fourth lever on the right. Shoot at the yellow point, jump down and go through the door to a new location.
You will find yourself in the Lower Mine. Break the slime and head right. Throw an explosive projectile into the debris in front of him, deal with another portion of mucus (there will be monsters as well). In the next room, destroy the slime and the new monster. To do this, you need to get close to it and pull it, like an ordinary plant. You can also catch the shells that he throws at you and throw them back. This will temporarily stun the enemy. Activate the beacon and climb the ledges. You need to go through several tunnels with slime and enemies. Destroy everyone. In the last adit, to kill each shooting enemy, use the explosive projectile at the top. Soon you will return to the room with the door, but find yourself at the top, at the lever. Pull it, go downstairs and shoot at the yellow dot above the door. Continue to follow the pipe and you will soon find yourself in an alien quarry. Ride up the elevator destroying slime and enemies. Upstairs you will find a huge alien construction.
Pull the two levers and go through the gate. Climb down the vines to reach the lower level where the alien capsule will be. Pull the third lever and jump over the rotating blades to the right. Destroy the monster and all the slime to activate the fourth lever. Get down even lower, kill two monsters, absorb the slime and activate the last lever. Watch the video. Go down below and defeat the bull. Make him crash into the columns and then attack the red dot on his back. Blow it up three times and the bull will be destroyed. Then open the capsule and watch the cut-scene.
Chapter 6. Looking for Trouble
You will return to the camp and see the mushrooms that lead to a new part of the planet. If you wish, you can go to the ship and buy upgrades. And then jump over the mushrooms, move forward and use the key to go to the garden. On the left, you will find a new device. Scan it and then hold LMB. With this device, you can rotate the concrete bridge. There is an explosive projectile to his left. Shoot him with a pulse cannon and immediately use RMB + LMB to pull him towards you. Throw in the slime in water to clear the area. Look up and see a seed over the stone bridge. Shoot him and plant in the green spot where the slime was to create mushrooms. Cross them to the other side.


Soon you will find yourself in an abandoned city. Go forward, destroy monsters and slime. Then climb up the tentacles and along the liana. Follow further, go downstairs and see the gate. You need to open two locks on the gates. You can also activate the beacon for fast travel. Go to the passage to the left of the gate to access the pool.
To get started, go forward and left. Destroy enemies and slime. When this area is cleared, climb up the yellow ledge and get to the device. Use LMB to rotate the nearest bridge so that you can go to the far bridge. Go along the bridges (climb the tentacle to the closest one) and clean this side. Climb higher along the mushrooms and ledges to find a second similar device. Rotate it perpendicularly so you can reach the vine. Go down and cross over to the left side. Go back up to the control device and turn the nearest bridge the way it was installed. Run back across it and use the distant bridge to get to the vine and create a short path. Get to the control device by going down the far liana and remove the first lock.
Go to the passage to the right of the door to the Gardener’s Studio. Climb the tentacle on the right, follow a little further and down. Destroy the slime and monsters and go down through the center hole. Once in the basement, jump forward and to the right, absorbing the mucus. Then, when you clear that area, the blades will start spinning. Use the rotating blades to jump across the room and absorb the mucus. Kill the only enemy. The seed will appear. Throw it onto the revolving platform near the green spot. If the seed doesn’t fall off it, jump in there and throw it at the spot. Jump over the mushrooms and get out. Kill an enemy and absorb all the slime. Use a new seed to throw it at two green spots at once. Use the mushrooms and platforms to get to the lever to open the second door lock. Shoot the explosive sphere to destroy the debris and get out of here.
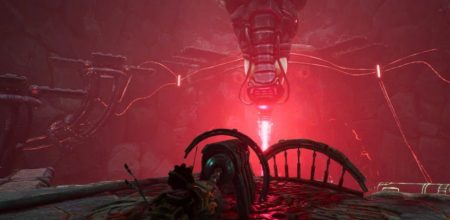
Back at the door, shoot at the two yellow dots on the left and right. Continue towards the alien device. Shoot the three yellow dots to go inside. Walk past the elevator. It needs to be activated. Go to the corridor on the right. Turn left and get over to the door using the yellow ledge. Shoot the yellow dot on the right to open the door. This will get you to the lever behind the next door and remove the grate that blocked the yellow button. Return to the elevator and go upstairs by shooting the yellow button. You will soon encounter the Gardener. It is impossible to defeat him, so run in a circle and hide behind the terminals. Take the moment and break open the panel with three fuses (the same as on the high tower earlier). Watch the video.
Chapter 7. Loneliness
You will find yourself in the Wasteland. Go forward, without turning anywhere, to the tall structure. Once loaded, destroy the slime. Continue navigating between green energy pools. Either look into the distance to see the glow from these pools, or follow the path, which will be lightly illuminated. Be sure to bypass the bulls, since you cannot fight with them now. You will soon be taken to another part of the location. go to the alien and break the seal on the pipe. Climb to the very top and watch the cut-scene.
Chapter 8. Reunions
After the video, use the workbench and then move to the old city. Go through the gate again, climb up the yellow ledges and run to the alien structure. The entrance to the inside will be blocked. Walk back a little and turn right. Going downstairs, look at the other side where the slime is flying. There is a yellow button on the column. Shoot her to trigger a platform. Stand on the platform and shoot the button. Absorb all the mucus along the way. This will reveal an additional entrance to the interior of the complex.
Take the only way and pull the first lever. Go down below, along the ledges to the right of it, and get to the second lever. Continue in a circle to activate the third lever. After the cut-scene, destroy the slime and go back a little. A passage opened on the right. This place should be familiar to you. You cannot go back directly to the elevator. Climb over the yellow ledge in the right passage and destroy all the slime. Clear the control room where the lever with which you opened the grate with the yellow button from the elevator is located. There is a hole on the side. Crawl through it to return to the hall with the elevator.
Unfortunately the lift is blocked. To get started, go to the passage on the left, where there are two curved plants with organic matter. Destroy the slime on the way and you will see a room with two passages on the right. Go to the far opening, absorb all the slime so that two tall mushrooms appear. Go to the near passage and shoot the explosive sphere to blast the mucus from below. The tentacles will open. There is mucus on the right and top. Shoot the same explosive sphere so that it falls onto the blade. The blade will lead her under the mucus, which will explode. Shoot again, but so that the sphere falls down, and throw it into the slime on the liana. After the explosion, tentacles will appear, along which you can climb the liana. Do this, move on the rotating blades and jump over the mushrooms. Clean out the adjacent room and corridor. Take an explosive sphere from the room, throw it into the corridor, run to her and throw the sphere on the slime in front. When it explodes (and flashes), shoot the yellow button with the Pulse Cannon. You will see that a round platform has started to move. Shoot the explosive sphere on the ceiling to make it fall onto the moving platform. She will take her to the slime, which will be detonated.
Go to the opened passage, go down and climb up the liana to the plant. Pick up the seed and throw it into the nearest doorway, into the room with an elevator. Shoot the button at the jaundice and jump onto the circular platform. Shoot again to move the platform to the center aisle and get out of here. Return to the room with the elevator and, on the other side, clear the room with slime and two monsters. Once done, pick up the seed and throw it at the energy point to create mushrooms. Climb along them to the liana, and climb into the room above the elevator to destroy the last slime. The lift will take you upstairs. Keep killing the slime to get higher and higher.
When the elevator stops a second time, look for a side platform. Jump and run across the bridge. Using the device, rotate the bridge and destroy two enemies. Look up and see a plant. Shoot at him and plant the seed in the green hole, and then climb up the mushrooms. You will first need to rotate the upper platform. Jump first to the right under the ceiling to create a short path down the liana. Then jump to the left, pick the seed and throw it at the green dot on the wall. A mushroom will appear, and you can make your way into the slime room. Destroy it to continue up the elevator. Get rid of the mucus on the way of the elevator again. This time it will be much easier.
The next time the elevator stops, jump onto the yellow paint bridge. Run to the left and enter the adjacent room. Here you need to destroy all the slime and every enemy. Then climb the mushrooms and get over to the other side. After reaching the device, use LMB to rotate the two bridges. Return to the elevator platform one at a time, and then jump onto the other on the right, with yellow paint. Throw an explosive projectile at all the slime until it is destroyed. Tentacles and a mushroom will appear. Jump over them to the left and shoot the seed. Mushrooms will appear. Jump on them and pick the seed by hand. Throw it on a tentacle, and from there – into a hall with an elevator. In this way, return back to the room where the first mucus was destroyed, and plant the seed. Climb the mushrooms to the liana and destroy all the slime that blocked the elevator. Keep on climbing destroy the slime on the way of the elevator again. Next, I propose to destroy the slime and kill small monsters. After that, lure the bull so that it crashes into the walls, and destroy the core on its back. As it was done earlier. And then you can leave the elevator.
How to defeat the Gardener.
Run up the steps until you return to the hall with the Gardener. The final battle will begin. To get started, run in a circle and find the keyhole. Try to interact with her, but nothing will come of it. Now go around again and look for a niche that will be open. Take the moment while the Gardener shoots a powerful laser, enter the niche and pull the first lever. Keep running in circles. Normal enemies will appear. The next niche with the lever will be open from the laser fence, but protected by slime. Destroy the slime, remembering that the Gardener is shooting at you. Kill nearby enemies and pull the second lever. Having done this, pull out the three white cables from the Gardener.


The second stage will be tougher in the sense that shooting opponents and bulls will appear. Bulls, by the way, will appear from time to time, so trying to destroy all enemies is pointless. On the other hand, the laser beam from the Gardener is harmful not only to you, but also to the bulls themselves. Pull the other two levers to free them of the mucus and yank the three cables out of the Gardener. Watch the final video.